The latest stencils I designed for StencilGirl had me thinking of boardwalks, foamy waves and saltwater breezes. If you want to transport yourself back to your favorite days on the beach, forget holding a shell to your ear and try stenciling instead.
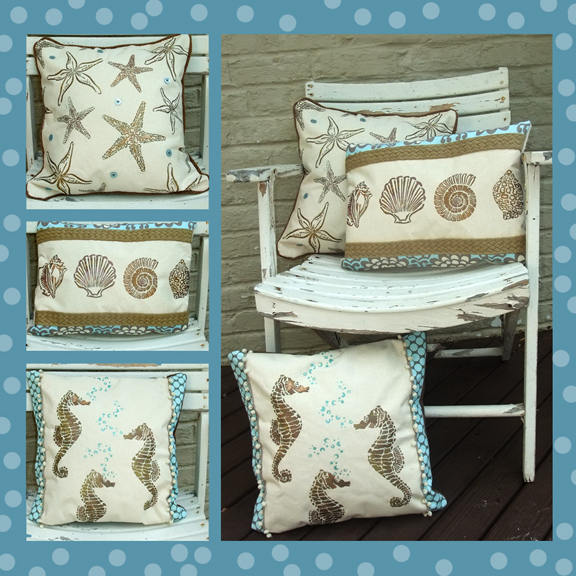
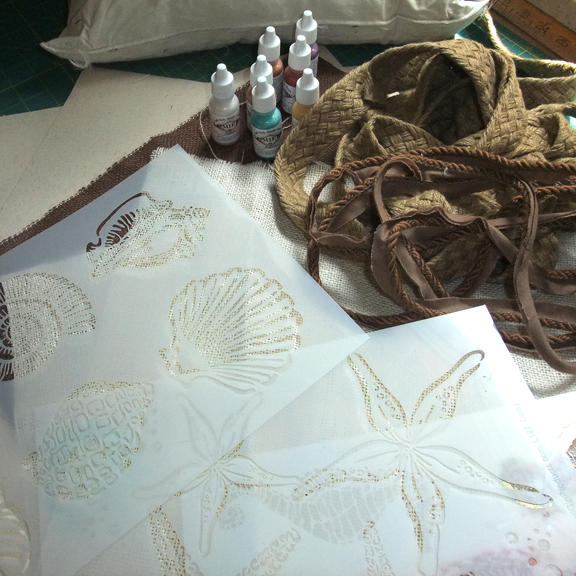
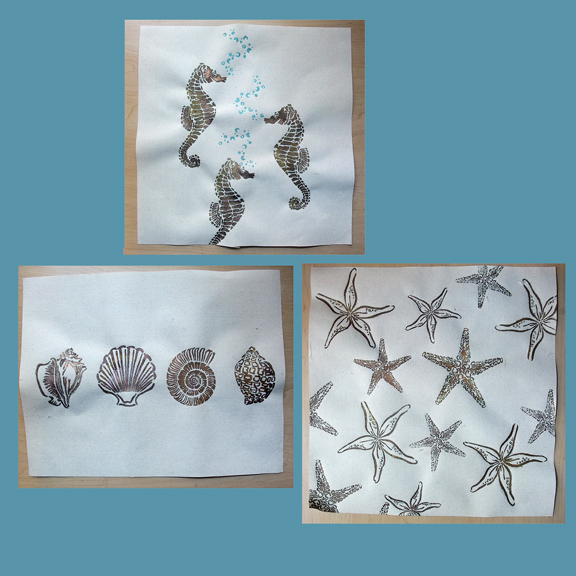
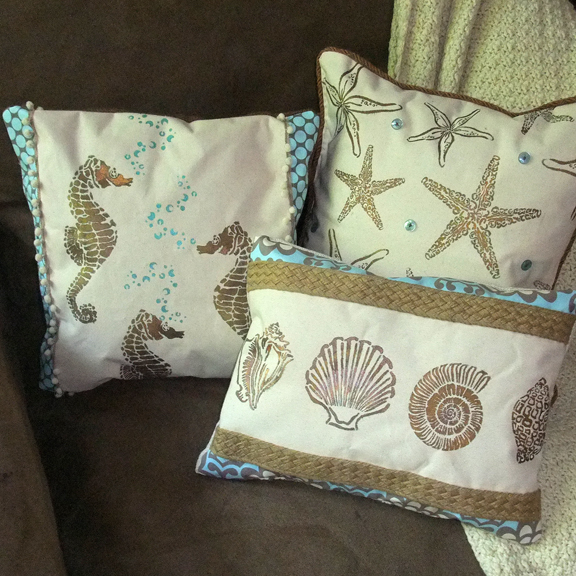
I made the three pillows above using my hot-off-the-press stencils (above) plus other materials I had on hand. Granted I have a pretty decent material stash (hoarder alert), but I promise these pillows are simple and quick to pull together. Here’s a general tutorial of how to create your own comfy beach pillows.
MATERIALS: (but feel free to improvise)
fabric paint (I used Lumiere acrylics for a bit of sparkle) . stencils . stencil brush . canvas on a roll (click if you want the exact stuff I used) . burlap (for pillow back) . material scraps reminiscent of the sea . trim . pillow form . sewing machine . needle . thread
1) Cut the fronts and backs of your pillow from fabric sized to fit your pillow form. I used burlap for the pillow backs and the unprimed side of the canvas for the pillow fronts (I liked the natural canvas side better for this project.)
2) Plain out your design before stenciling on the fabric. Taking the time to do a practice pillow on a similar size piece of scrap paper will be time well spent. You get one shot on that fabric folks!
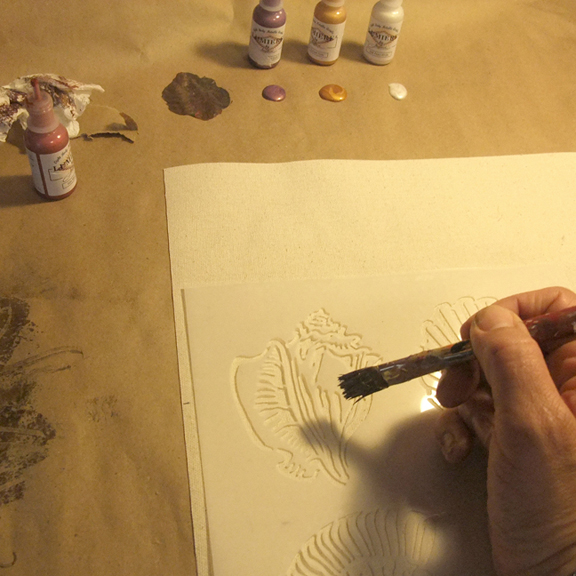
3) When ready to stencil on the fabric: lay ironed canvas flat, position stencil and apply paint. Make sure your brush is not too wet. Again, practicing before will allow for better results on the real deal. Take my word for it.
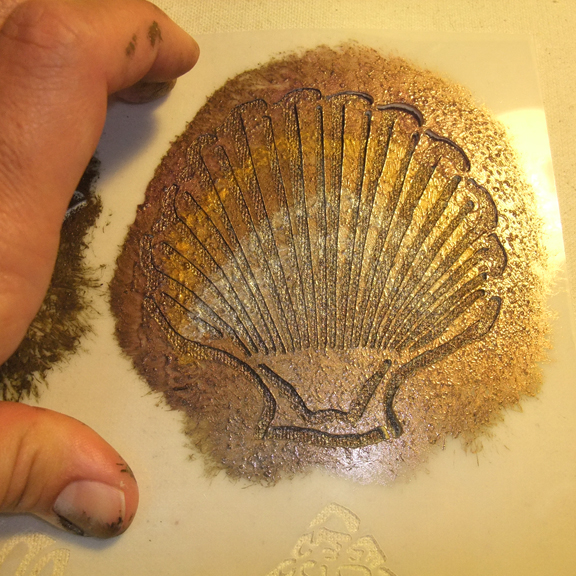
4) I used several warm Lumiere colors to add depth and interest. Subtle, yet awesome. You can kind of see the variation of colors above, but admittedly it’s hard to capture in a photograph.
5) Let your pillow fronts dry. Above see how I chose to design my pillows (Wet, please don’t touch.)
6) Add some fun! Buttons, trims, fabrics etc. Stitch embellishments to the pillow fronts before you sew the front and back together. Otherwise you will have a seriously difficult time here.
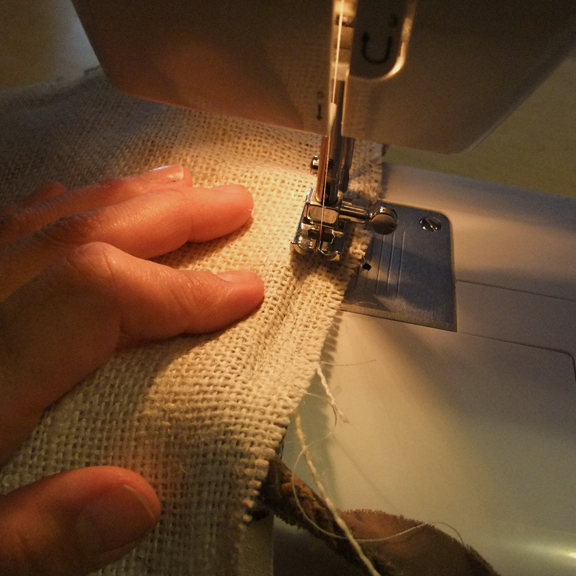
7) Now place the front of the pillow under the front of the back of the pillow (inside out). Add some side trim if you desire and sew together. Remember to leave an opening to insert the pillow form.
8) Insert pillow form and hand stitch the pillow shut the rest of the way.
9) Enjoy a bit of the sea even if like me, you don’t have an oceanfront address.
Thanks for stopping by. It was certainly nice to meet you if you’re new over here. The blog hop party continues below with the Original Stencil girl, Mary Beth Shaw! (that must be how it feels to be a presenter at the academy awards. I sure lucked out.






WOW what a fantastic project.. I love your pillows!
Great to see your progress!
Oh are these adorable….love what everyone is doing woth your stencils, can’t wait to play with them too! xox
all I need now is a little sand on my feet… Love them!
June–I already told you what an AMAZING project this was. Now you have an AMAZING tutorial for it! Thank you so much for all your hard work helping with this blog hop! Maria
Love your stencils June ~ must make some pillows like yours! :)
I absolutely love what you did with this stencil. Thank you so much for sharing this with all of us.
wowser!
If I had a machine I would try this. They turned out gorgeous!
Wow! Love these pillows- they are elegant! Truly elegant! I love the ocean so I was drawn to your stencils in a big big way!
Beautiful designs, your pillows ended up fantastic!
Love those pillows and the photos. Reminds me of my summers as a college student
Love some stencil fun
Awesome Stencils! Love the pillows!! Thank you for Sharing!
The gold was a great idea. Goes with everything and so rich looking. :-)
Love the cushions and the stencil.
I LOVE these stencils & your projects are just gorgeous! Thanks for sharing.
Great use of your stencils. It makes me home sick for Galveston. These would make great home decor items, not just pillows, but wall hangings as well. Thanks for sharing.
Love the sea theme/collection. Can “sea” them on t shirts and shorts for little girls. Beach bags, wall quilts, espadrilles, hats…oh yes!
I love this. I’ve never stenciled on fabric before. I think I will try this.
June your cushions are beautiful. What a fabulous use of your wonderful stencil designs!
I love this project. I would just have to find blank pillow cases!
Love your stencils! Thanks for the tutorial!
I love what you’ve produced with these fabulous stencils!
love those pillows and stencils used–thanks for great tutorial
Beautiful!
these pillow are fantastic. I love them. reminder to self – need more stencils.
Love, love, love these stencils and this tutorial. Since I can’t be at the beach all the time, I have decided to have a beach inspired room in my house. Going to have to try this.
Oh my, they are BEAUTIFUL.
I can see those pillows on my couch. Guess I’ll just have to win one of those stencils….fingers crossed.
These are gorgeous June! Very creative way to use the design!
Take care and STAY POSITIVE!
wow i just absolutely love, love, love what you did with these stencils. super duper job. sure would love to win this set. xox
It is nice for various sites to have stencils that we can win. It’s really appreciated by me to have an opportunity to win and to use stencils of various subjects.
2nd. comment [here] =LOVE* LOVE sea horses ….w/ love from plumz soapz
Lovely pillows! Thank you for showing us how!!!
Thank you for the tutorial and for the great way to use this stencil. Thanks, too, for another chance to win it.
June, This pillows are stunning! I love your ocean-themed stencils. Thanks for sharing them with us.
Great tutorial. Thanks for another chance in the giveawy.
Wow, gorgeous pillows…love them!!!
Gorgeous pillows…fabulous stencils!
What a gorgeous fresh looking project. Thanks for sharing.
What a cool project! I’d love to try this myself. Thanks for the inspiration!
What cool projects. Love the pillows!!
My daughter loved the water and the ocean. I lost her Oct 2011 and having these stencils would give me the opportunity to do some memory pages of her.
these look like they cost hundreds of dollars. Love it!
Simply LOVE these pillows and the stencils !!!
Love your pillows. Great use of stencils. Thanks for the tutorial, too.
i am speechless! i looove the stencils and what u did with them, too awesome for words! aloha, angi in hana
So very cool!
Wow, These are sand-tastically coolio pillows!! I want to make some of my own now! Thank you for sharing your process too!
Those are gorgeous!!
I love the stencils. I agree with MaryBeth maybe next a sea urchin and I would add a squid and a jelly fish
This is lovely I love the stencils. Your project is beautiful,thank you for sharing.
susan salyer
These projects are AWESOME!!!! Absolutely gorgeous and inspired! Thank you for sharing!
SUsan Chong
beegsmachine@yahoo.com
Give me a sec while I pick my bottom jaw off the floor. I could totally see these being sold at a place like Pier 1. I really need to build a better relationship with my sewing machine. (we don’t see eye to eye, it’s rather sad) You did a great job showing another great way to use these or any type of stencils. You picked the perfect colors for this project as well. I’m TOTALLY impressed. Have a great weekend. (((HUGS)))
wow what a great idea …
how beautiful! they would look great in my beach house!
What a great project!
Great projects. I love the stencils!
your pillows are simply stunning! What an awesome idea!
Gorgeous pillows! Thanks for the tutorial – the lumier paints add just the right shine. Thanks for the inspiration!
I would love to win these to start my own project!
As a beach lover this has got to be my all time favorite stencil. It has so much versatility. Awesome Project. I think I may have to give this a try :)
Blessings,
Kathy Carter
carterscraftingcorner.blogspot
https://www.facebook.com/CartersCraftingCorner?ref=hl
Love these beachy inspired stencils! The sea horse is awesome!
Beautiful stencils and professional results with the pillows. Thanks for sharing your ideas.
great pillows.
stamping sue
http://stampingsueinconnecticut.blogspot.com/
Your pillows and stencils are so fun! They feel relaxing, just like a trip to the beach!
June, I love your stencils and these gorgeous pillows!
The iridescent colors are beautiful with the canvas and burlap!
What an inspiring tutorial! :)
Love Love Love your pillows!! They are great! And the stencils are awesome!! Looking forward to adding some to my collection soon!
wow these are awesome I can see all kinds of Christmas gifts out of this idea. I think I have to have these stencils.
Kitty
LOVE the Lumiere paints on your pillows!
Great stencil designs! Love ‘em…
Makes me think of peaceful time at the beach.
These are gorgeous !!!!!!!!!!!!
Your pillows are wonderful! Thanks for the tutorial and the chance to win a stencil.
Oh, and I’m glad to have found your blog, too!
Love the stencils and those pillows are amazing!!!!
your pillows are wonderful and your stencils — marvelous!
Thank you all so much for your sweet sweet comments. You all inspire me. I love this supportive community! : )
Your pillows are gorgeous! You’ve inspired this not-great-sewer person to attempt some. I love love love your stencil designs!
These pillows look as if they would cost a fortune to buy.Great tutorial.
Susan Samuel
Wonderful choice of colors and materials to complement these designs.
So Creative! ;) Love it!
love seeing the tutorial
LOVE TO SEE THE STENCILS BEING USED ON A PILLOW.. FOR HOME DECOR.sometimes you forget that you canuse them for more that artwork. but also home décor. tfs!
June, your stencils and projects are wonderful!
I love the pillows and the stencils! They are really awesome! Love to win a stencil or will want to purchase several of them!
I love the way you used the stencils. have a great day. smilz
Very sweet colors. Thank you for sharing. Here in N.FL we have a shell show every summer.
I also have quite a stash of fabric – I am going to have to try stencils on fabric. I always make papers for my collages – but fabric would be a nice change. Thanks!!
These cushions are beautiful!
Those are beautiful pillows! It’s great you can use the luminarte sparkling acrylics. I love the colors!
Fabulous project!