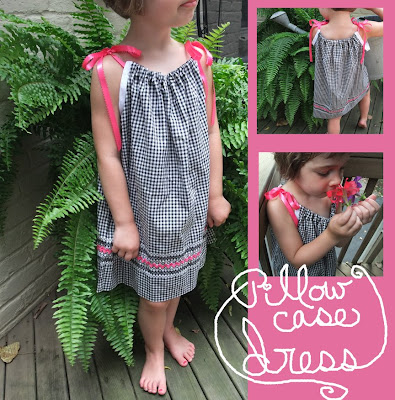
 Right before we left for vacation, I finished this project. After acquiring several sweet pillowcases back here in the height of yard sale season this has been a wannabe project on my list. The Internet is a gold mine of pillowcase projects, however I found the instructions for her toddler size dress on page 128 of this awesome book.
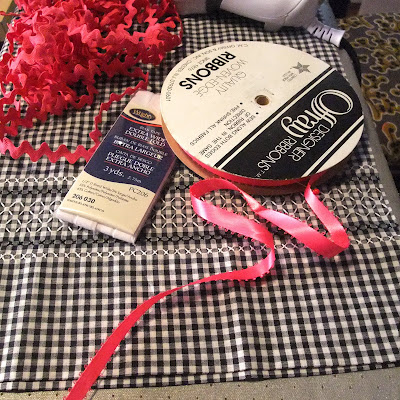 Supplies needed were a pillowcase, a pack of extra wide (1/2″) double-fold bias tape, 2 yards of 5/8″ ribbon, 1 1/4 yards of jumbo rickrack, thread and a sewing machine. I will say that the black checked pillowcase was initially a hard sell to Miss Pretty-in-Pink. However, I convinced little Nora that her favorite color would be the perfect accent for the sophisticated black. She considers herself a fashionista so she looked at me with a huge amount of trust and agreed that black is the new pink (when mixed with pink.)
 After gathering my supplies, I cut off the top (the closed end) of my pillowcase. I then used a J shaped pattern to cut an armhole on each side of the top of the case.
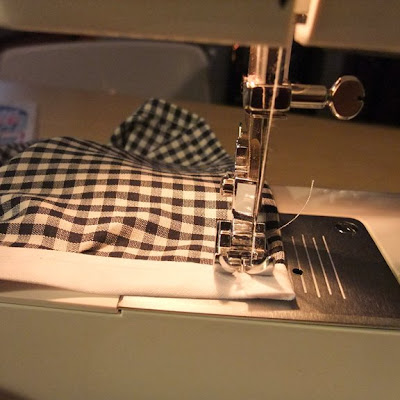 Next, with two 15″ lengths of white bias tape, I binded the armholes (binding=strip sewn over or along an edge for reinforcement or decoration.) Then, I finished the top of the dress by creating a casing on the front and back (casing=a narrow passage for a rod or cord, as in a curtain or the waistband of a garment, made by folding over a small strip of fabric at its edge along its width and sewing it in place.)
note to experienced sewers: please disregard the definitions of these basic sewing terms I know you know. I define only for newbies like me who are still learning the language.
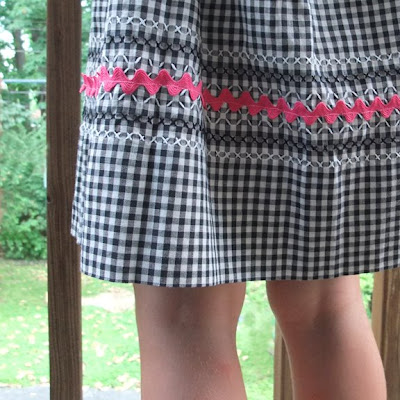
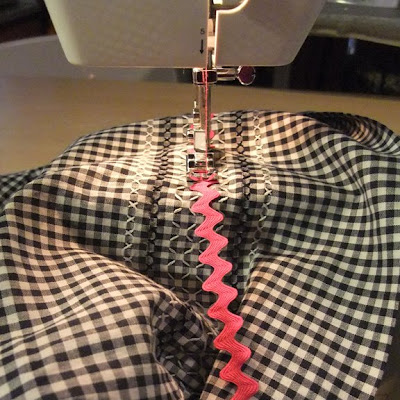 As promised, I added a hefty piece of hot pink rickrack to the bottom of the pillowcase. I straight-stitched right down the center of the rickrack all the way around starting and ending at a side seam. The smocking you see was already part of this pillowcase…an extra bonus.
 I then threaded hot pink ribbon through the top casing in the front and the back of the dress. I pulled to cinch and then sewed the ribbon at each open end so that the ribbon wouldn’t come out (you know…like the annoying hoodie cords I find in my washing machine or catch my children holding…like those will ever go back in their casing.)
 That’s it….finished! This easy project didn’t take more than an hour or so. Admittedly, if someone told me 6 months ago I’d be sewing clothing not only for me, but for my kids, I would have laughed and told them that they were CraZy. I had less fear about making a sculpture out of 250+ Red Bull Cans than pushing a pedal on a sewing machine (which I now know is ridiculous because can art is certainly more difficult and frustrating than sewing, but that’s another story.) The bottom line is if I can sew, anybody can. Case closed.


Oh my friend you are fully EMBRACING your sewing bug-great dress!
OH this is cool!!!!! Thanks for sharing!
Smiles, Anke ;)
Lovely! Love the way you used double fold bias tape (why it never occured me, dah?!).
Adorable. I am also a little 'scared' to sew. Go figure, huh?
Also loved the sweet sleeping kitty pic. Awe…..