While my blogging life as been on a rather extended break, please follow me over on Instagram @junedaleyart for previews of my latest work!


While my blogging life as been on a rather extended break, please follow me over on Instagram @junedaleyart for previews of my latest work!
 One of the first stencils I designed for StencilGirl was the Spider Web stencil. I’m not sure what that says although I’m betting I was prepping for Halloween and thinking how I needed a web stencil. I’ve used it for many of my Halloween projects including this pillow. If you’re interested in making your own, the complete tutorial can be found over on the StencilGirl blog. What projects will you be creating this fall?
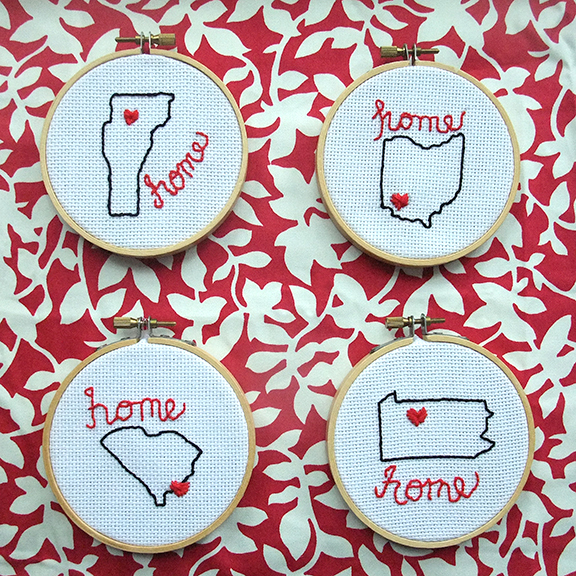
Today I’m showing some state love over on the Stencil Girl blog. These personalized, embroidered hoops make great gifts for family and friends. Click here for the full project!

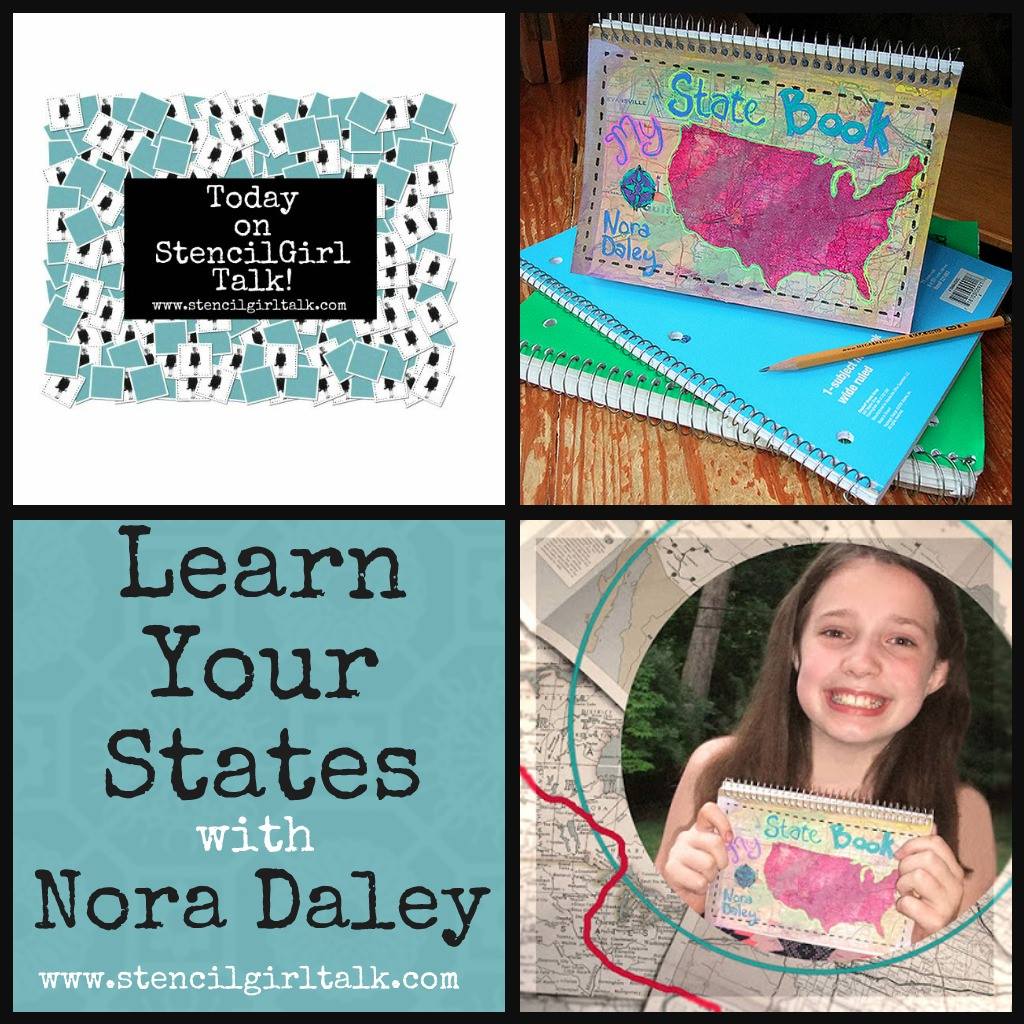
My daughter Nora demos how to make a State Study book (a great summer project!) over at the Stencil Girl blog.
 Today, I have two new stencils debuting over at Stencil Girl: sea urchin and sand dollars. In their honor I’ve whipped up a batch of tea towels that are super easy to make. As a bonus they make great gifts, think Mother’s Day and end-of-the-year teacher. For the complete how-to click here.

It happens almost every Sunday. I’m in Church with my three kids and inevitably one whispers about needing a tissue. I scramble to find something adequate in my purse, but it seems I’m often fresh out. This inspiring scenario led to the idea to make cases for tissue packs to whisper back “bless you” the next time they were needed (and I’ll never admit I created this project in my head during the homily, although thinking about angels and blessings is appropriate, right?!)
As the holiday season approaches, I’ll be creating more of these to “bless” family and friends. This quick and easy project make adorable stocking stuffers for loved ones. They also make the perfect holiday gift for those angelic teachers.

PROJECT MATERIALS:
6 1/4″ X 7″ piece of Jacquard Stabilized Fabric
6 1/4″ x 7″ piece of coordinating fabric
Jacquard textile fabric paints
Jacquard Lumiere metallic acrylic paints (I used Metallic Gold; Pearl Turquoise; Pearl Violet; Pearlescent Magenta; Pearl White; and Pewter)
coordinating thread
iron
sewing machine
paint brushes
DIRECTIONS: 1. Cut one 6 1/4″ x 7″ piece of Stabilized Fabric and lightly draw an angel design with pencil. (Click angel pattern above for a printable PDF of my design. Use tracing paper to transfer on fabric.)

2. Paint the angel and background with fabric paint. Use Lumiere metallic colors for the wings, halo and background.
3. Let fabric dry for 24 hours before peeling off backing. Remove paper backing and heat set with iron for three minutes.

4. Cut a coordinating 6 1/4″ x 7″ piece of fabric. With right sides together of the coordinated fabric and painted fabric, stitch 1/4 inch from the edge all around the outside of the fabric. Leave about a 1 inch opening for turning near the bottom of the angel.

5. Turn and press. Fold the sides of the tissue holder with coordinating fabric facing out. Overlap the edges approximately 1/4″ in the middle.

6. Stitch 1/4 inch from the edge along each short end.
7. Turn right side out and insert a pocket tissue pack.

TIPS: Dip a wooden dowel in white paint and “stamp” on your fabric to make a quick and uniform dot pattern.

Make each angel unique by painting different hair and skin colors.
Work assembly style and you’ll be blessed with a chorus of tissue holders to gift before you know it!
p.s. I’m super excited to now be collaborating with Jacquard Products to develop new project ideas with their fabulous art supplies! In the notice of disclaimers all Jacquard products have been provided. However, a glowing recommendation is all my own.
 Wondering how you’re going to handle your hot caldron this Halloween? How funny…so was I! Witch, I mean which : ), is what inspired me to design a couple of quilted caldron/pot holders. Follow along for a quick tutorial.
 materials:
4 assorted fabrics (9″ x 9″ top; 9″ x 9″ bottom; hat and star according to pattern; 40″ x 2″ binding; 6″ x 2″ loop hanger); batting (3-10″ x 10″ squares); fusible web; iron; sewing machine; thread; needle; embroidery floss.
materials:
4 assorted fabrics (9″ x 9″ top; 9″ x 9″ bottom; hat and star according to pattern; 40″ x 2″ binding; 6″ x 2″ loop hanger); batting (3-10″ x 10″ squares); fusible web; iron; sewing machine; thread; needle; embroidery floss.
 1. Use my free pattern (click here) to trace the hat bottom, middle band, hat top and star onto the smooth side of the fusible web, leaving a 1/4″ allowance all around each shape. Cut out the shapes just outside the marked lines. Press the hat shapes and star onto the wrong side of each of the chosen fabrics. Cut out the shapes accurately along the marked lines. Iron the shapes to the quilt top.
 2. Make a quilt sandwich with the bottom/back fabric, three pieces of batting and finally the top/front of the potholder (a.) Pin together with safety pins.
3. Use a variety of machine stitches to quilt your block together (b.-c.) Use hand stitching to quilt the twirly line connecting the star to the hat.
4. Trim the excess batting from sides to make a perfect square.
5. To make the hanger loop, fold a 6″ x 2″ fabric strip in half lengthwise and press. Open out and fold each raw edge toward the center fold. Stitch along the long edges (d.) Set aside.
6. Cut a 40″ x 2″ strip of fabric for the edge binding. My new favorite way to machine attach binding is courtesy of my quilting instructor, Heather. She has a fabulous picture heavy tutorial here. Attach the loop hanger into the left hand corner of the binding.
2. Make a quilt sandwich with the bottom/back fabric, three pieces of batting and finally the top/front of the potholder (a.) Pin together with safety pins.
3. Use a variety of machine stitches to quilt your block together (b.-c.) Use hand stitching to quilt the twirly line connecting the star to the hat.
4. Trim the excess batting from sides to make a perfect square.
5. To make the hanger loop, fold a 6″ x 2″ fabric strip in half lengthwise and press. Open out and fold each raw edge toward the center fold. Stitch along the long edges (d.) Set aside.
6. Cut a 40″ x 2″ strip of fabric for the edge binding. My new favorite way to machine attach binding is courtesy of my quilting instructor, Heather. She has a fabulous picture heavy tutorial here. Attach the loop hanger into the left hand corner of the binding.

For an alternative design, I attached a spider to the end of the hat rather than a star. The spider consists of two fused circles and hand-stitched legs and eyes.
Enjoy creating a funky piece of functional decor just in time for Halloween!
I’ve stared at the same old, ugly stapler on my desk for a long time. I use that standard office tool almost every day. I decided it was time that it got a makeover/sprucing up and joined in on my mantra of “art just for fun.” Now when I staple documents together, I can’t help but smile at my cheerful office companion.
PROJECT MATERIALS: stapler; staples; Jacquard Piñata alcohol-based paint (I chose a palette of white plus three additional colors: sunbright yellow, lime green, baja blue); Jacquard Piñata clean up solution; Jacquard Piñata claro extender; clear satin fixative; 16″ of trim (more or less depending on the size of stapler); aluminum flashing (to use as a paint palette); paint brushes; glue gun and glue sticks.

DIRECTIONS:
1. Clean stapler as needed. When the stapler is clean and dry, apply paint directly from the bottle to the stapler. You may also squeeze a small amount of paint to the aluminum palette and apply the paint to the stapler with a paintbrush. Continue adding paint to the stapler. Piñata paints dry quickly so use claro extender if you want to buy yourself more drying time. Otherwise, enjoy experimenting. You can always remove the paint with the clean-up solution and start over if you wish.

2. After you have painted all the parts of the stapler, let dry, preferably overnight.
3. To give your stapler an extra coat of protection, spray with a clear satin fixative and let dry.

4. Choose a coordinating trim to decorate the top edge of the stapler. Cut the piece to fit all the way around the top edge. Make sure the trim does not interfere with the loading of staples or the stapling! Use a glue gun to adhere.

5. Don’t forget about the staples! Who says staples need to be a boring silver? Apply Jacquard Piñata alcohol-based paint directly from the bottle to the top and sides of the staples. You can paint an entire row one color or make a rainbow-colored staple row so you never know what color will emerge next.
Enjoy your one-of-a-kind, extraordinary stapling sensation. This functional work of art will brighten up any office space making work seem more like play.

TIPS: Experiment with different paint combinations on the aluminum palette before applying to the stapler. Limiting your palette to three or four colors may produce the best results.
Try painting wet on wet, as well as allowing the colors to dry between applications.
Add white to the colored paints for a more opaque effect. However, the color will still remain somewhat translucent blending with what’s underneath.
Young artists can try this project too. Nobody should be stuck with a boring stapler!
Remember there is no right or wrong way to paint a stapler.
For a printer friendly pdf of this project click here.
p.s. I’m super excited to now be collaborating with Jacquard Products to develop new project ideas with their fabulous art supplies! In the notice of disclaimers all Jaquard products have been provided. However, a glowing recommendation is all my own.

My dear friend Anke softly reminded me that I haven’t been around here too much lately. My excuse is I’ve been continuing to post daily over at Merrier Shopping. I’m having fun writing about all things holiday, but I’m not going to lie. Daily posting including weekends is quite a job. Especially when you strive to make every post interesting by throwing in tutorials and illustrations to boot. If you didn’t follow me over, here’s a roundup of some past craft and recipe posts that I don’t want you to miss:
1) Glittered toy ornaments; 2) Chalkboard placeholders and acorn napkin holders; 3) Baked apples with cranberries; 4) Dressed-up Peanut Butter Cookies
Today, I resorted to letting my cat write the post. I may have lost it.Until I can hire an assistant, the felines of the family need to be on high alert as they could be called into service at any second. I really need to teach them how to work my Etsy shop..tons of new prints to load. Or maybe I should give up on sleeping…hmmmm….
While I mull it over, I promise to come around here more often now that I know someone is paying attention. Thanks Anke!

My holiday blog job has been keeping me busy to say the least. I’ve been posting over there daily since November 1st. This weekend, I’ve added two tutorials that my like-minded, creative friends might enjoy. You can make my original JOY potholder by clicking here.

You can also check out my step-by-step recipe for Rocky Road Bark candy by clicking here.
This week, I’m looking forward to meeting my GGP friends (sponsors of the Merrier Shopping blog) in person. We’ve been chatting over the phone and by e-mail for over a month so it will be great to connect with actual faces. And I hear there will be press involved. Pray for a good hair day. Thanks for visiting this site and my holiday blog. I can’t tell you how much I appreciate your support through the comments and the warm e-mails sent my way. Thank you! : )