Blog

November 9, 2009

I can’t tell, but you can guess…

This year, I’m participating in Cincinnati’s Secret Artworks auction on Friday, November 20th. Secret ArtWorks is a fundraising event featuring the exhibition and sale of 5″ x 7″ works of art from local, national and international artists. All works of art sell for $75 each. The ‘secret’ behind each piece is the identity of the artist which is revealed after the work is purchased. ArtWorks is a non-profit arts organization that connects artists of all ages with opportunities in the arts through inspiring apprenticeships, community partnerships and public art.

Check out the hundreds of pieces already submitted for this year’s event. I have three pieces among the entries. Any guesses? If you’re in the area, tickets to this really fun party that benefits a worthwhile cause can be purchased here. I have my eye on a couple I’d like to be lucky enough to bring home…that’s providing we all stay healthy and I can actually attend. By the way, I’m feeling much better (after accepting defeat and going to the doctor)…thanks for the well wishes. : )
Filed Under: fine art
November 4, 2009

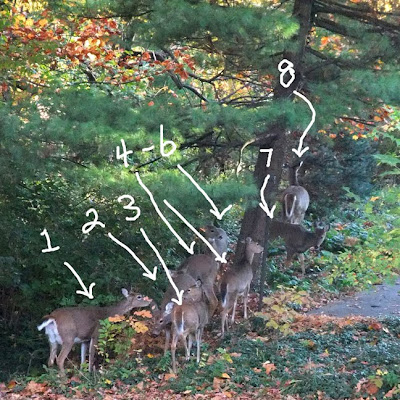
A view from the deck

This is not a deer farm, but rather my urban backyard. On any given day of the week we can peer out the windows and see our friends frolicking…eating from bird feeders, munching on shrubbery and flowers without a care in the world. Deer like it here and feel very, very comfortable. They don’t seem to care that this is not suburbia or a place where there should be large quantities of wildlife (sorry Dad.) And me? I’m officially sick after being in denial throughout the weekend. I’m afraid it’s payback time. My body is not happy about my refusal to pass on parties and other Halloween festivities when I knew better. Really I did. So here I am, showing you pictures of female deer rather than an interesting project. Now, I need to doze…not eight. (sorry…toomuchsinusmedicine confusing bad deer joke.) Off to rest.
October 31, 2009

Have a hair-raising Halloween

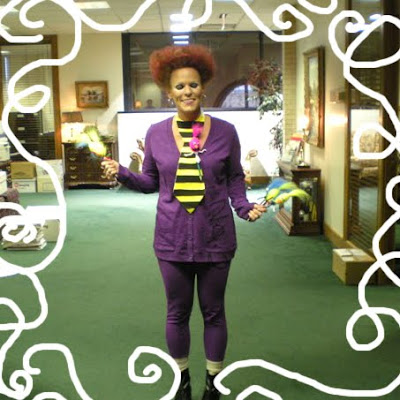
We’re busy today getting costumes together, candy ready and pumpkins carved for the big night. I’m taking a short break from our halloweenish prepping to wish you fun and safe trick-or-treating and share a truly unique, completely cute costume.

Meet Nancy from Oklahoma. Last week, Nancy ordered several packs of frustration pencil kits mentioning that she was going to dress up as a giant frustration pencil herself! I had never met Nancy, but thought to myself how she had to be a pretty fun gal. I asked if she would share a photo which she kindly did. I’m loving the hair. Nancy passed out frustration pencils to her coworkers yesterday and won third place in her office Halloween contest! Way to go Nancy!

Now off to carve our pumpkins…
Filed Under: Uncategorized
October 26, 2009

Turning the pages

I’m so pleased to have my art included in the latest *gorgeous* issue of Cloth Paper Scissors. There is a ton of amazing work in here. I especially love the “Stuffed Horse Ornaments” by Samantha Jenkins and “Everyday Women” by Nola Hart, but that is naming just a few for sure.
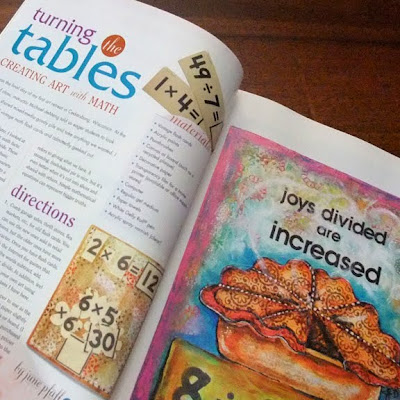
My article included in this issue provides a step-by-step to creating art with flashcards. I promise, it will get you thinking about equations in a more artistic way.

The original flashcard pieces featured in the article are now available for sale over in my etsy shop. These pieces have been created on vintage self-hanging plaques so there is no need for additional framing. Prints of the originals are also available.

Okay back to sick kids. That certain flu has officially hit our house…yes it’s definitely multiplying which means my undivided attention has been focused on sanitizing and taking temperatures. As a result, we had to subtract our weekend travel plans. Nothing more to add to that (except of course to bug you with math puns. Sorry about that. : )

October 23, 2009

When a spider leads to a pumpkin

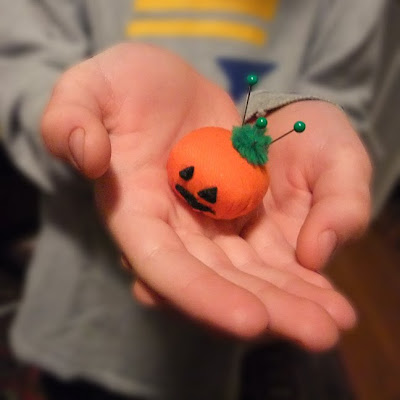
Inspiration is a funny thing. It begins as a spark and catches quick if you let it (kind of like a certain flu you may have heard is going around.) In the case of inspiration, it’s a good thing (the other, not so much.) I ‘ll admit that when I’m asked to help with 5th grade math I don’t jump quite as fast as when my 7-year-old son (or any child for that matter) comes to me asking for help with a craft idea. Brendan thought the spider pincushion I made earlier this week was pretty cool. He told me he had another idea for a pumpkin pincushion and wondered if I could help him make it. Let me tell you, when my sports driven-nintendo playing-legoite-son asks to make a pin cushion you had better believe it gets my attention.

We quickly gathered our supplies which consisted of orange fabric, orange thread, a bottle cap, fiberfill, black felt and a green chenille pipe cleaner. Then using the exact same technique as with the spider body, I guided him in the making of his one-of-a-kind creation. After Brendan had the pumpkin all sewn up, he cut the eyes and a mouth out of the black felt and attached with liquid stitch. Then, he cut a bit of the chenille pipe cleaner for a stem and inserted it in the top of the pumpkin. Finally, Brendan added a few pins to top off his completed pincushion. He was so proud he even brought it to school to show the class.

While this cute pumpkin is smile-inducing on its own, it’s the fact that it was created from a tiny spark of inspiration by a 7-year-old boy that makes me smile the most.
October 19, 2009

Bottle cap Spider Pincushion

Just in time for Halloween, I’ve put together a quick little project to add a dash of fun to your sewing area. That’s if you can get your…ahem…three kids to stop playing with it.

Here are the craft supplies you’ll need:
1-4 inch circle (spider body) and 1-2 inch circle (spider head) cut from your choice of fabric
Coordinating thread
1 bottle cap
2 beady red straight pins (spider eyes)
4-5 inch pieces of black craft wire (spider legs) and 1-1 inch piece of craft wire (spider palps)
Fiberfill
pliers, wire cutters, fabric scissors, needle

To make the spider body, straight stitch around the edges of the 4 inch circle. Then pull the thread slightly to gather up the edges. Stuff with fiberfill. Insert bottle cap. Now gently pull the thread to enclose the fiberfill and bottle cap in the fabric. Stitch to secure the bottom of the spider body. To make the spider head, repeat the above steps with the 2 inch fabric circle omitting the bottle cap.

Now attach the spider head to the body with the sewn end of spider head facing the body so that your stitching doesn’t show.

Stick the beady red straight pins into the spider head for eyes. Just under the eyes insert the 1 inch piece of craft wire. These are the spiders “pedipalps” or in simpler terms “the little thingeys that stick out by the mouth that make a spider “spiderish“.”

Next, carefully insert each craft wire through the bottom of the stuffed spider body to make a total of eight legs. Use pliers to shape the legs like so.

Place the completed spider pincushion on a doily web. You may just want to keep her out all year long. She does know a thing or two in the sewing department.
Filed Under: crafts, projects
October 14, 2009

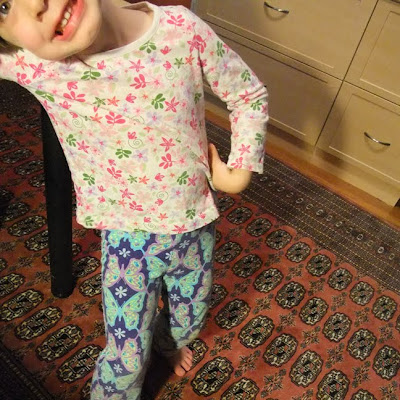
how about a little pattern with that smile?

This morning I turned around from my computer and saw this….a sight equal to about three or four cups of coffee for sure. WOWZA, did that ever wake up my eyes. Do ya think she picked that rug on purpose?! Let’s just hope she can find socks to match.
Filed Under: kids
October 12, 2009

One brick closer

I almost didn’t participate this year because I thought I didn’t have the time…then I reconsidered. Bricks Along the Journey a.k.a. the annual Breast Cancer Bricks Silent Auction was way too important not to make the time.

from the Bricks Along the Journey website:
“The “Bricks Along the Journey” Project was established as a symbol of life, rejuvenation, and hope. Bricks salvaged from the rubble of old buildings have been transformed into stunning works of art. This transformation is the perfect metaphor for the experience shared by all Breast Cancer survivors. We take these bricks that have been knocked down and bring them to life again. The brick auctions have been instrumental in raising money for various, local Breast Cancer agencies.”

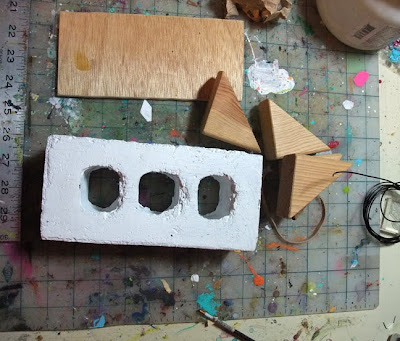
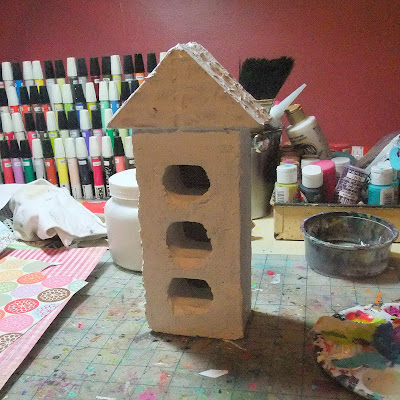
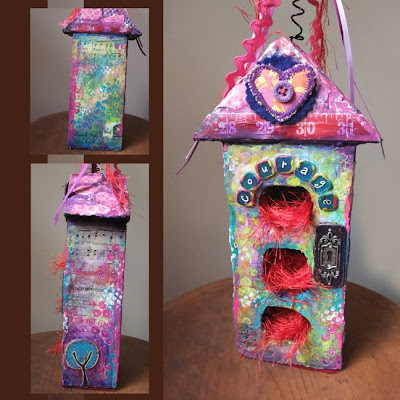
I started my piece with a three-holed brick, a piece of plywood cut to size for the back and four wooden (child) building blocks for the roof.

I attached everything securely together with liquid nails and then gessoed the entire piece both to seal and add texture. After that, I added bits of collage and paint to the house.

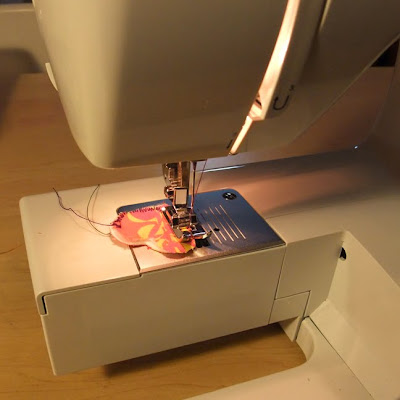
I sewed a little quilted heart detail for the front of the house. And I…

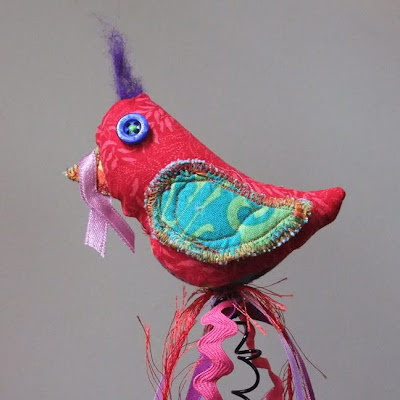
…created the little bird on the top of the house with various fabric scraps. Then, I attached button eyes, a wisp of wool and a breast cancer awareness pink ribbon. (note: the main body of the bird was inspired by a project included in one of my favorite books: Warm Fuzzies.)

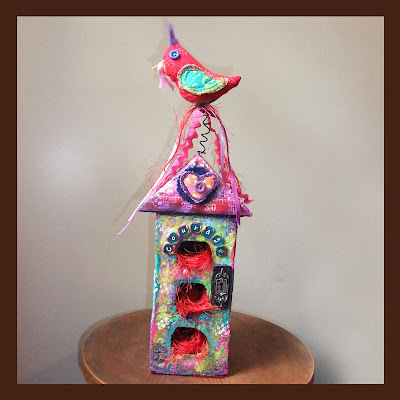
Here are a few different views of my finished brick titled “Flying High.” The brick home is symbolic of shelter and stability, while the bird represents the courage to leave the safety of the nest and fly again. Now I’m off to deliver this to the auction chair with the humble hope that my art can help this worthy cause. Admittedly, one brick isn’t much by itself, but many bricks together can build houses.

To make a donation to Bricks Along the Journey
click here, then click “Donate.” If you are in the Cincinnati area, the silent brick auction will be on Sunday, October 25th, 2009. Visit the website for details.
Filed Under: projects
October 10, 2009

This is spooky…

To get you in the mood for Halloween, I thought I’d take you on a haunted tour of the latest project happening around here. Be warned…this isn’t for the faint of heart.

If you think you can back out now or that any of these light switches actually work you are sorely mistaken.

Watch your step. The floor may or may not be underneath you.

Secrets of the past are harbored inside these walls.

Plaster tiled walls will not let go of their memories without a fight.

Did you think you were going to be able to take a bath here tonight? (insert evil laugh and spine-tingling music.)

Now, now, don’t be afraid. It’s just our first floor bath being remodeled or as 4-year-old Nora more accurately describes, “destroyed.” Lucky for us, we still have a bath and a half intact to help us through these harrowing times. However, I will admit that the past few days have had me on the edge of my seat. The banging/sound of walls crumbling along with a fine mist of circulating dust is happening on the other side of my studio walls. All who have lived through remodeling of any kind know that these are not fun times. It will be good in the end though. And I promise to share photos when the light shines again in our brand new bathroom.
Filed Under: Uncategorized
October 6, 2009

Picture day Accusations

Today, I was accused of the unthinkable. I had an early morning trial for attempting to make my 7-year old, darling boy look “dumb” on school picture day. First, let me restate to the jury that I did not even think for a second that this particular 7-year-old gave one little hoot about what he wore as long as it was reasonably comfortable. Therefore, a lengthy picture day outfit consultation was not scheduled the night before like was with my 10 year old daughter.

When I learned the truth this morning I was shocked. Brendan DOES care what he wears on picture day and Brendan will no longer wear something that is “knit and yarned “…said while making circular finger motions to describe the offensive garment(s).

Thankfully, we managed to settle out of court on a navy blue, button down. Simple. Classic. No “yarn” involved. Brendan smoothed his negotiated picture day shirt and said he liked his look. Then he put on his backpack, turned and headed out the door. Now let’s just hope he smiles.
Filed Under: kids

Copyright 2025 June Pfaff Daley/Daley design, LLC
A Darling Site