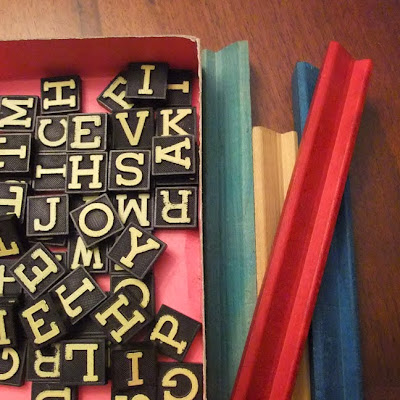
 When I entered the scene of a particular yard sale a month or so ago, I almost turned around and walked right back out before doing a thorough investigation of the goods. At first glance, the sale seemed to have an abundance of overpriced Tupperware and plastic novelties. But since I had taken the time to stop the car, I figured I’d at least check out the pile of books on a back table. And that’s when I saw it. A small box shoved to the side. I gulped. Vintage scrabble?! My heart skipped a beat. There wasn’t a board, but the letters and letter racks were enough for me. With the asking price of 50 cents for the set, I realized that some people value Tupperware, while others prefer vintage letters. Absolutely nothing wrong with that.
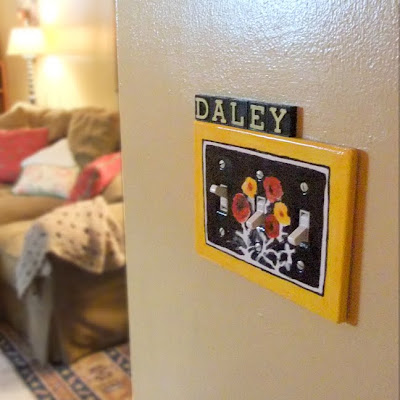 I knew those little blocky letters would be great in a mixed media piece, but I also realized they were cool enough to stand on their own. So I spelled out our name and let them rest on the light switch plate in our entryway. Hubby please stop reading…
(actually they are attached to the wall with a little dab of hot glue. Yes, I was aware that the painter of the house would not be happy with the decision to take a glue gun to the walls, but at least it’s not hay or plastic flowers, right? …anybody see those Trading Spaces episodes??!)
Hubby continue reading…
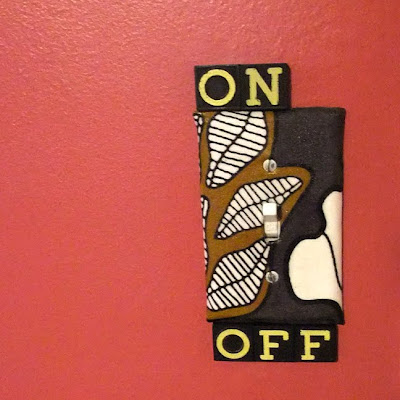 I also came to the conclusion that my fabric covered studio switch plate could benefit from letter additions so I “attached” more tiles. I love spelling out the obvious.
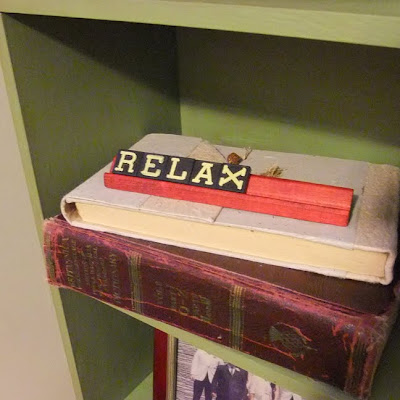 Less daring I suppose is choosing to display a word on one of those charming, old wooden racks. The X is on its side on purpose. You get it right?! This also spells what to do when you discover how your wife attached scrabble letters to the walls. XOXO : )
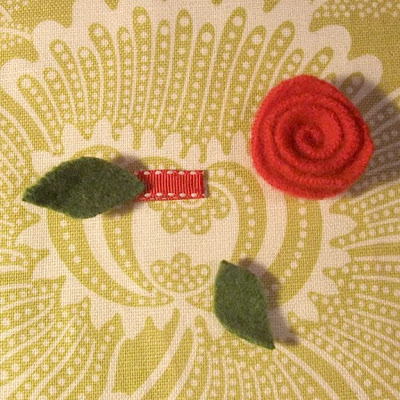
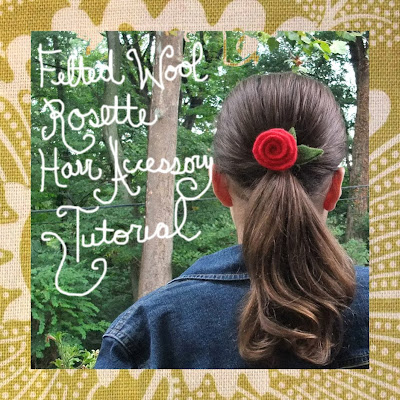 The past week has been filled to the brim with design work, kid’s homework and activities plus all the usual. That doesn’t mean that I haven’t been dreaming of new projects. Over the weekend, I took a crafty time out and made a half dozen or so of these happy rosettes from recycled felted wool sweaters. The idea stemmed from a rosey wreath project by Betz White in the new Holiday Crafts magazine by Better Homes and Gardens that I’m planning to make very soon. This tutorial focuses on a hair clip, but the idea can easily be adapted for pony tail holders, headbands and pins.
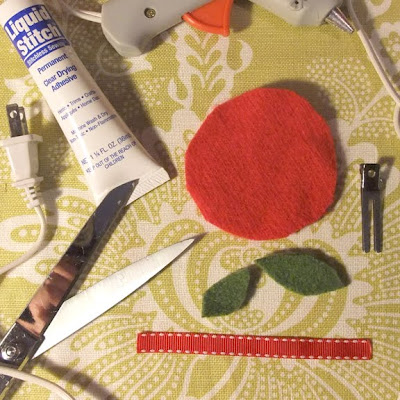 In addition to felted wool (in the colors of your choice), you’ll need a 3/8 inch coordinating ribbon, a hair clip, fabric scissors, fabric glue and a glue gun.
To felt wool: Place your thrifted or unwanted 100 percent wool sweaters in the washing machine. Wash on the HOT cycle. Place the sweaters in the dryer. Basically do all that you would never dare do with 100 percent wool sweaters and feel very rebellious. Next, go over to your local tattoo parlor…kidding. Do that after you make your rosettes.
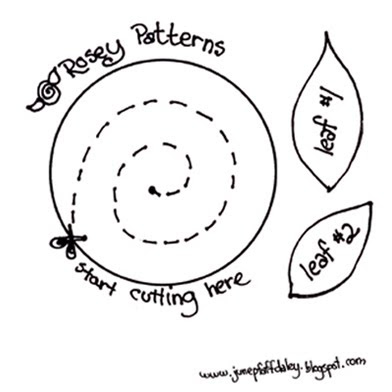
For the patterns, left click on the above image and print. Your circle pattern should be approximately 3 inches. If for some reason your circle prints larger or smaller than three inches, adjust the print percentage as necessary.
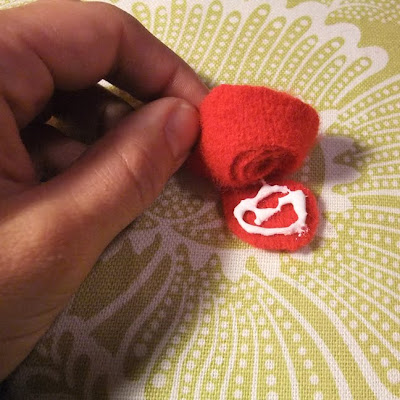
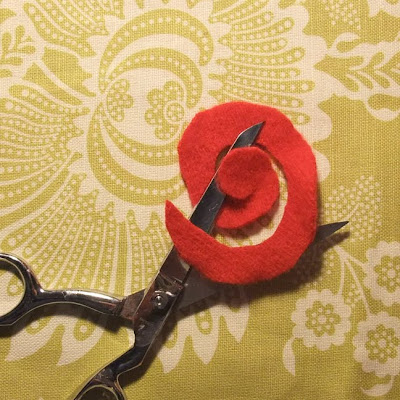 Using your pattern, cut a circle from the rose wool color. Then, cut a spiral shape using the pattern as a guide. It doesn’t have to be perfect (no flower is) so wing it with confidence.
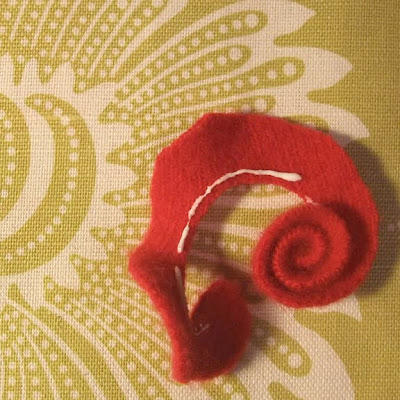 Starting from the outside of the spiral, use fabric glue to attach at the bottom edge of the flower. Wind to shape the rosette.
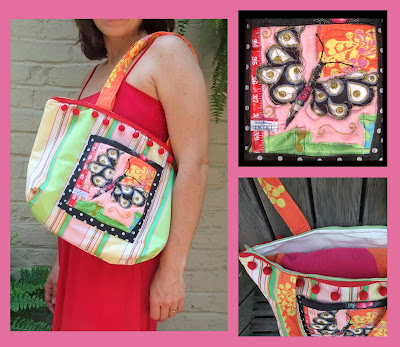
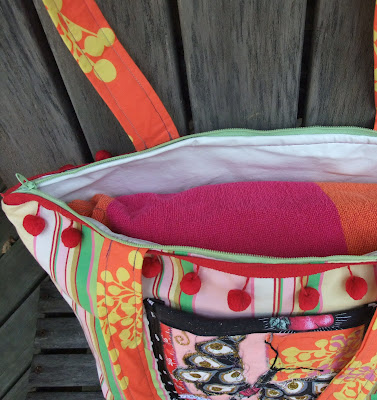
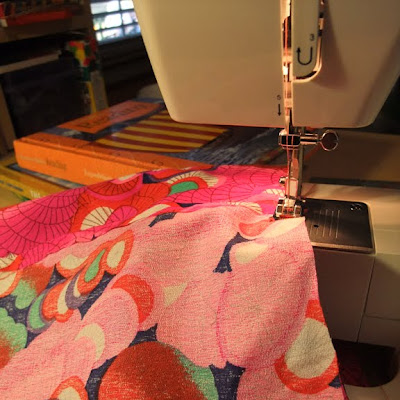
Making slight modifications, I built off what I had learned from zippie pouches. This time, I created straps and sandwiched them between the outer fabric and the liner. I also squared off the corners of the bag’s bottom so it would be nice and roomy for a beach towel or whatever else.
One goal of mine in making this bag was to buy nothing new (that in addition to making it look like a bag in the first place.) That large piece of stripey fabric was a heavy weight fabric sample that I purchased from an interior designer’s $1/swatch yard sale awhile back (awesome sale…goosebumps just thinking about it.) I used a water resistant type of white fabric for the liner.

Here’s where I really had fun. I started the pocket by making a quilt sandwich…liner, batting and pink felt on top. Then using a variety of fabric scraps, ribbon, a vintage vinyl tape measure and even a clothing tag, I appliqued the pocket with my sewing machine. I created the butterfly pocket much like I would a painting or collage. I used fabric as my paint (cutting pieces of all shapes and sizes) and the sewing machine became my brush (adding line and texture.) I only broke three needles…I’m working on that. A needle is not quite the same as paintbrush. To finish off the pocket art, I applied gold and silver fabric glitter.
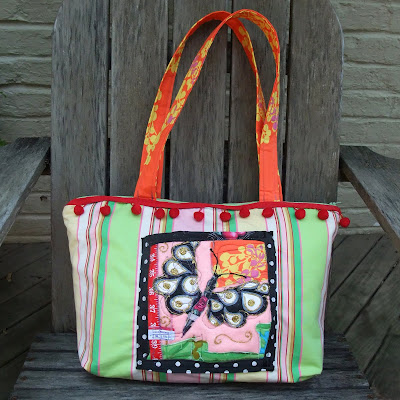
 Here’s me with my first ever bag. And the icing on the cake…I was one of three runners up in the Chica’s challenge! My prize, besides adding tote bag to my sewing resume, is a crafty chica bobblehead and a gift certificate to the MakerShed store.
I definitely see more bags in my future. Next time I promise step-by-steps, keeping it real (broken needles and all!)


