
While my blogging life as been on a rather extended break, please follow me over on Instagram @junedaleyart for previews of my latest work!


While my blogging life as been on a rather extended break, please follow me over on Instagram @junedaleyart for previews of my latest work!
 One of the first stencils I designed for StencilGirl was the Spider Web stencil. I’m not sure what that says although I’m betting I was prepping for Halloween and thinking how I needed a web stencil. I’ve used it for many of my Halloween projects including this pillow. If you’re interested in making your own, the complete tutorial can be found over on the StencilGirl blog. What projects will you be creating this fall?
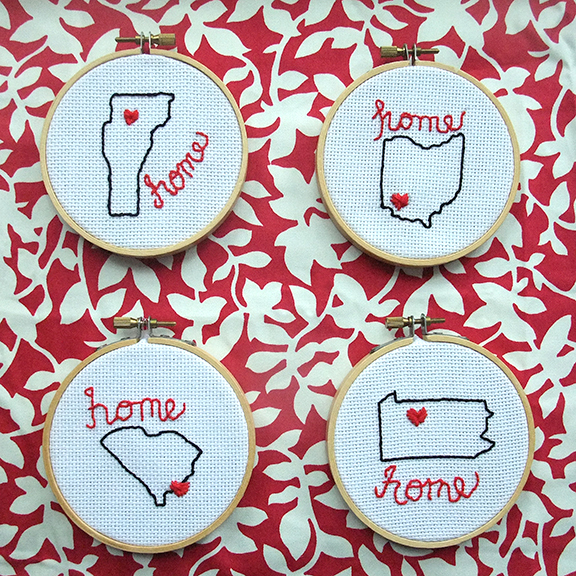
Today I’m showing some state love over on the Stencil Girl blog. These personalized, embroidered hoops make great gifts for family and friends. Click here for the full project!

 Today, I have two new stencils debuting over at Stencil Girl: sea urchin and sand dollars. In their honor I’ve whipped up a batch of tea towels that are super easy to make. As a bonus they make great gifts, think Mother’s Day and end-of-the-year teacher. For the complete how-to click here.
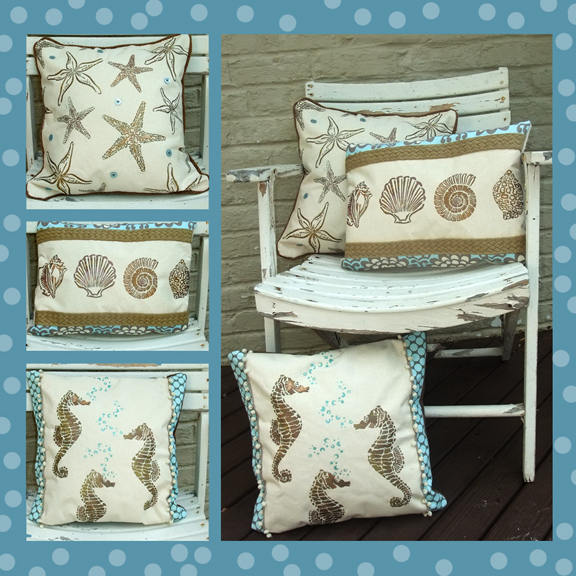
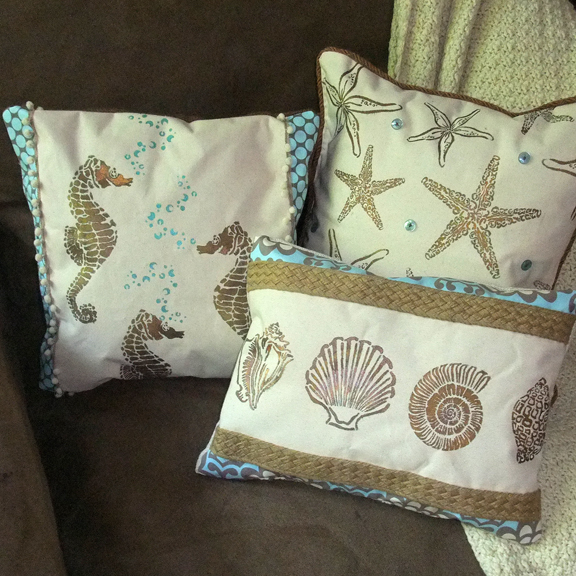
The latest stencils I designed for StencilGirl had me thinking of boardwalks, foamy waves and saltwater breezes. If you want to transport yourself back to your favorite days on the beach, forget holding a shell to your ear and try stenciling instead.

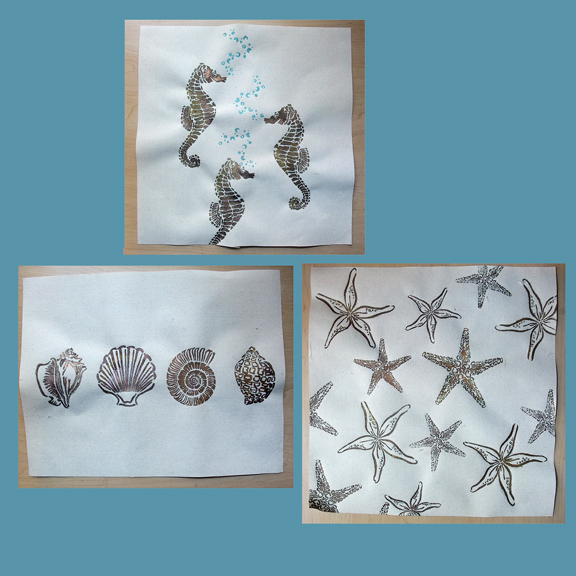
I made the three pillows above using my hot-off-the-press stencils (above) plus other materials I had on hand. Granted I have a pretty decent material stash (hoarder alert), but I promise these pillows are simple and quick to pull together. Here’s a general tutorial of how to create your own comfy beach pillows.
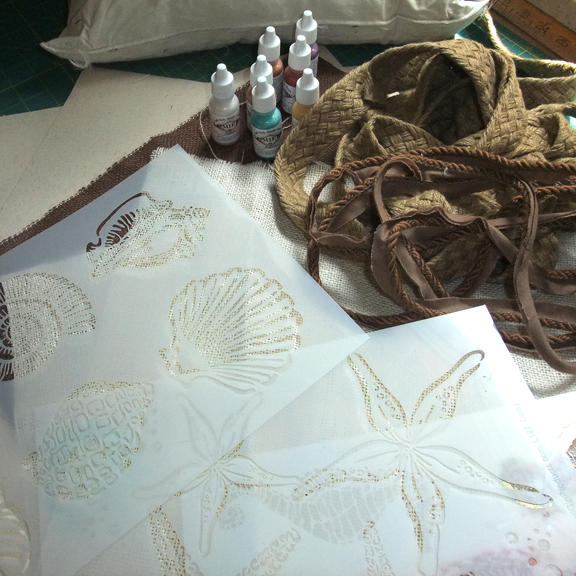
MATERIALS: (but feel free to improvise)
fabric paint (I used Lumiere acrylics for a bit of sparkle) . stencils . stencil brush . canvas on a roll (click if you want the exact stuff I used) . burlap (for pillow back) . material scraps reminiscent of the sea . trim . pillow form . sewing machine . needle . thread
1) Cut the fronts and backs of your pillow from fabric sized to fit your pillow form. I used burlap for the pillow backs and the unprimed side of the canvas for the pillow fronts (I liked the natural canvas side better for this project.)
2) Plain out your design before stenciling on the fabric. Taking the time to do a practice pillow on a similar size piece of scrap paper will be time well spent. You get one shot on that fabric folks!
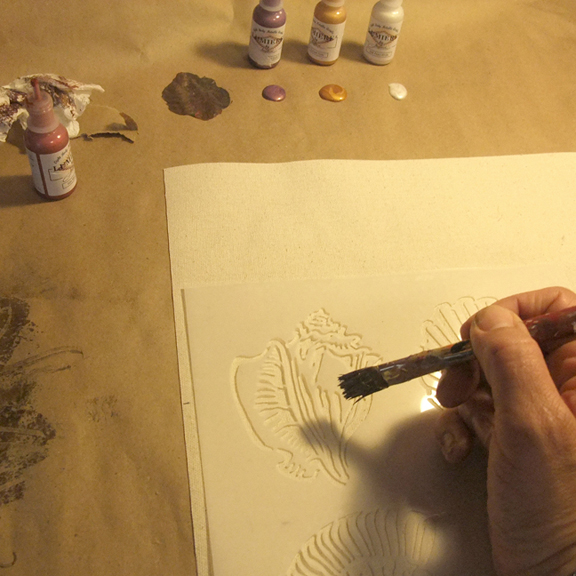
3) When ready to stencil on the fabric: lay ironed canvas flat, position stencil and apply paint. Make sure your brush is not too wet. Again, practicing before will allow for better results on the real deal. Take my word for it.
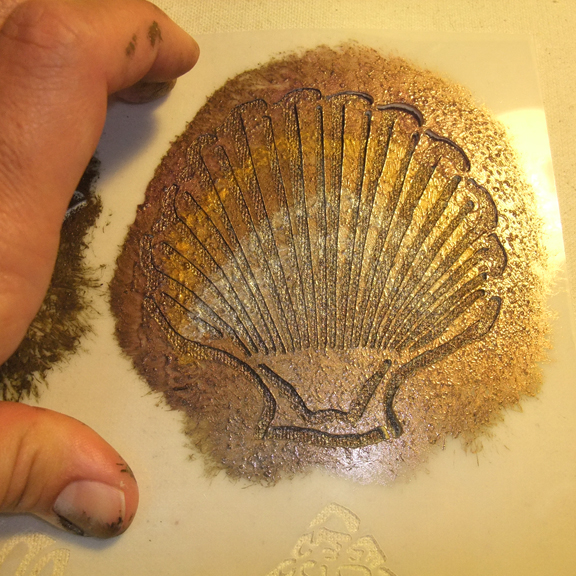
4) I used several warm Lumiere colors to add depth and interest. Subtle, yet awesome. You can kind of see the variation of colors above, but admittedly it’s hard to capture in a photograph.
5) Let your pillow fronts dry. Above see how I chose to design my pillows (Wet, please don’t touch.)
6) Add some fun! Buttons, trims, fabrics etc. Stitch embellishments to the pillow fronts before you sew the front and back together. Otherwise you will have a seriously difficult time here.
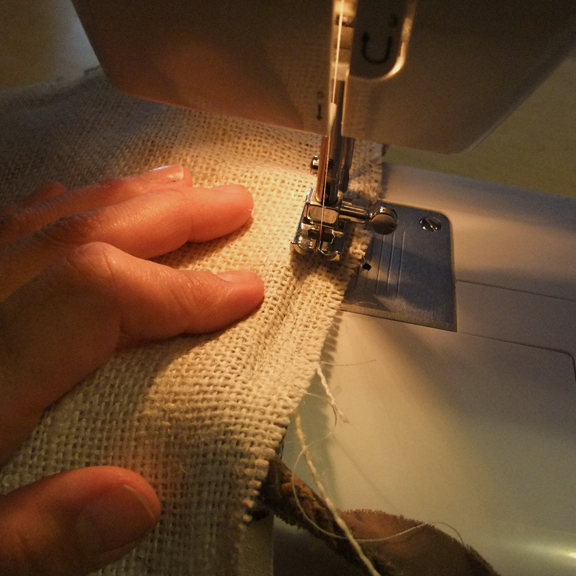
7) Now place the front of the pillow under the front of the back of the pillow (inside out). Add some side trim if you desire and sew together. Remember to leave an opening to insert the pillow form.
8) Insert pillow form and hand stitch the pillow shut the rest of the way.
9) Enjoy a bit of the sea even if like me, you don’t have an oceanfront address.
Thanks for stopping by. It was certainly nice to meet you if you’re new over here. The blog hop party continues below with the Original Stencil girl, Mary Beth Shaw! (that must be how it feels to be a presenter at the academy awards. I sure lucked out.
 Wondering how you’re going to handle your hot caldron this Halloween? How funny…so was I! Witch, I mean which : ), is what inspired me to design a couple of quilted caldron/pot holders. Follow along for a quick tutorial.
 materials:
4 assorted fabrics (9″ x 9″ top; 9″ x 9″ bottom; hat and star according to pattern; 40″ x 2″ binding; 6″ x 2″ loop hanger); batting (3-10″ x 10″ squares); fusible web; iron; sewing machine; thread; needle; embroidery floss.
materials:
4 assorted fabrics (9″ x 9″ top; 9″ x 9″ bottom; hat and star according to pattern; 40″ x 2″ binding; 6″ x 2″ loop hanger); batting (3-10″ x 10″ squares); fusible web; iron; sewing machine; thread; needle; embroidery floss.
 1. Use my free pattern (click here) to trace the hat bottom, middle band, hat top and star onto the smooth side of the fusible web, leaving a 1/4″ allowance all around each shape. Cut out the shapes just outside the marked lines. Press the hat shapes and star onto the wrong side of each of the chosen fabrics. Cut out the shapes accurately along the marked lines. Iron the shapes to the quilt top.
 2. Make a quilt sandwich with the bottom/back fabric, three pieces of batting and finally the top/front of the potholder (a.) Pin together with safety pins.
3. Use a variety of machine stitches to quilt your block together (b.-c.) Use hand stitching to quilt the twirly line connecting the star to the hat.
4. Trim the excess batting from sides to make a perfect square.
5. To make the hanger loop, fold a 6″ x 2″ fabric strip in half lengthwise and press. Open out and fold each raw edge toward the center fold. Stitch along the long edges (d.) Set aside.
6. Cut a 40″ x 2″ strip of fabric for the edge binding. My new favorite way to machine attach binding is courtesy of my quilting instructor, Heather. She has a fabulous picture heavy tutorial here. Attach the loop hanger into the left hand corner of the binding.
2. Make a quilt sandwich with the bottom/back fabric, three pieces of batting and finally the top/front of the potholder (a.) Pin together with safety pins.
3. Use a variety of machine stitches to quilt your block together (b.-c.) Use hand stitching to quilt the twirly line connecting the star to the hat.
4. Trim the excess batting from sides to make a perfect square.
5. To make the hanger loop, fold a 6″ x 2″ fabric strip in half lengthwise and press. Open out and fold each raw edge toward the center fold. Stitch along the long edges (d.) Set aside.
6. Cut a 40″ x 2″ strip of fabric for the edge binding. My new favorite way to machine attach binding is courtesy of my quilting instructor, Heather. She has a fabulous picture heavy tutorial here. Attach the loop hanger into the left hand corner of the binding.

For an alternative design, I attached a spider to the end of the hat rather than a star. The spider consists of two fused circles and hand-stitched legs and eyes.
Enjoy creating a funky piece of functional decor just in time for Halloween!
 Maybe it’s that time of year or the weather or something, but I’ve recently caught myself starting to google, half-seriously, “What should I do now?” If only I could bing the Internet to provide a personalized step-by-step artistic path…what to prioritize and/or what to let go. Cold, dreary weather is a creative drain. Fortunately, I was able to snap out of it this weekend to organize my studio. In the process, I realized a thing or two.
 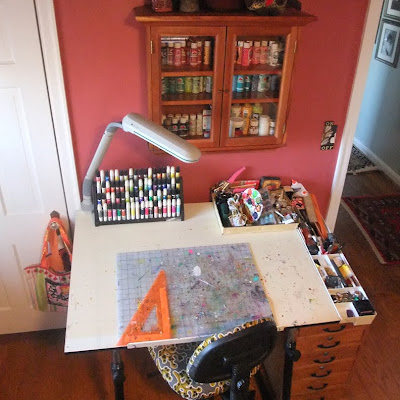 I’m pretty sure that one of the best cures for a muddled and disorganized head, is a neat and organized work space. Messiness is distracting.
 I marvel at design, craft and sewing books that manage to keep a single focus from beginning to end with beautifully, illustrated step-by-steps along the way. This is not possible in actual life.
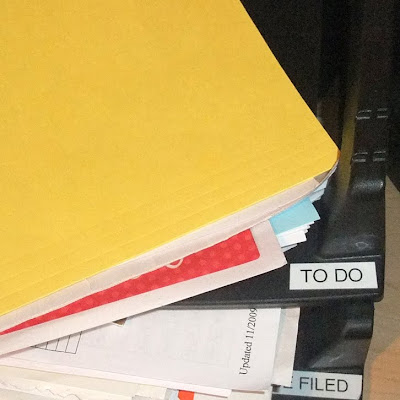
 I believe in being prepared for any occasion. However, it’s also important to be able to see what you already have.
 I sorted through overflowing fabric bins and let go of uninspiring pieces. Extra stuff adds weight rather than inspiration.
  My girls and I went for a fall walk the other day. Crunching under our feet were hundreds of little acorn hats. We stopped to inspect them closer, loving their tiny details…an absolutely gorgeous crafting material. We collected as many as our pockets could hold and brought them back to the studio for some acorn brainstorming. While my daughters dreamed up a family of acorn people, I worked to create an acorn frame with a hanger.
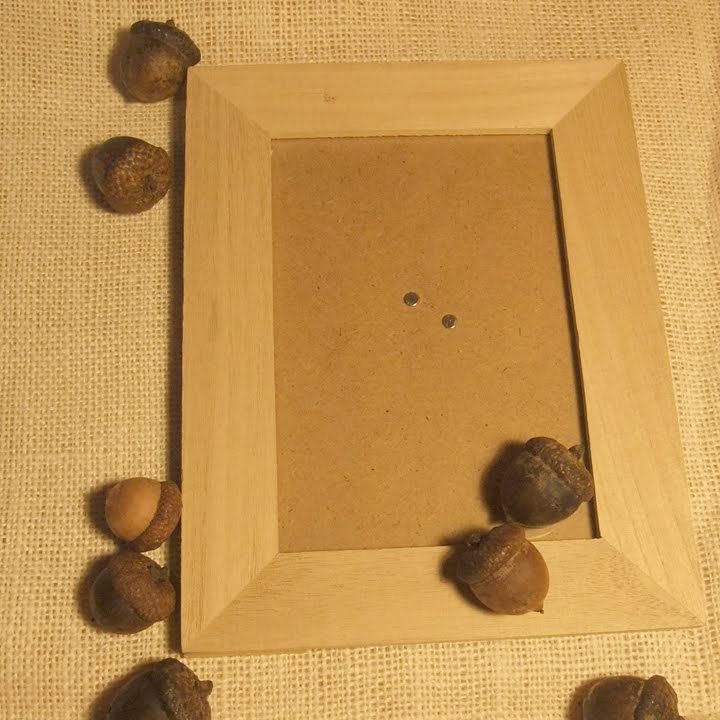 materials needed:
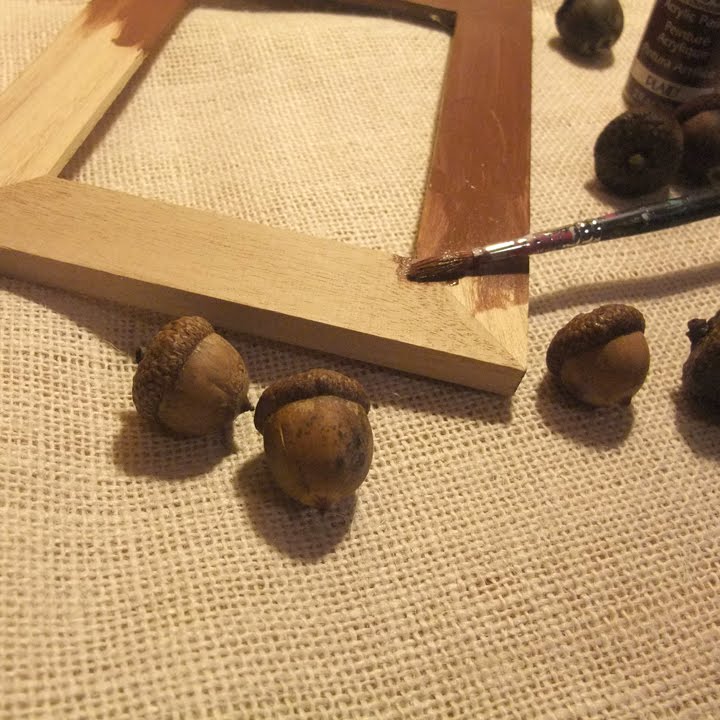 step one.
 step two.
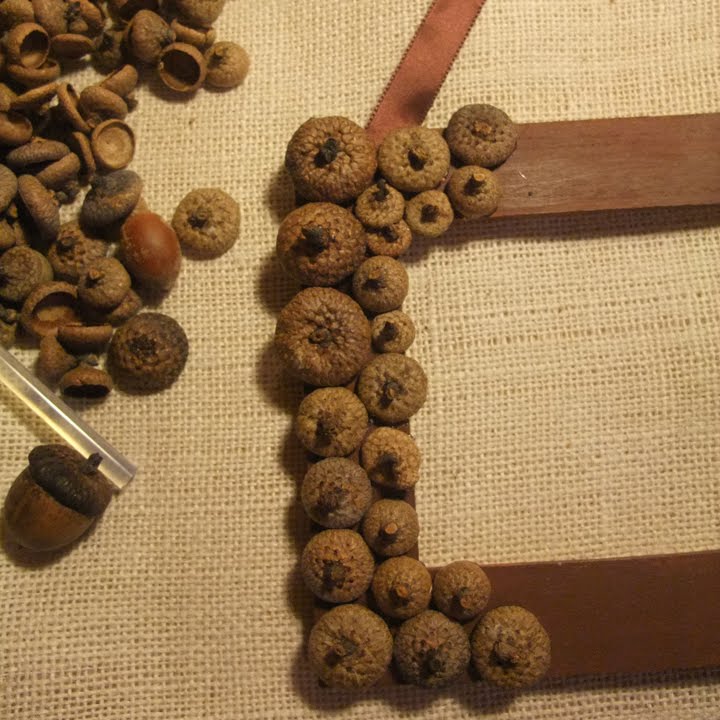 step four.
 step five.
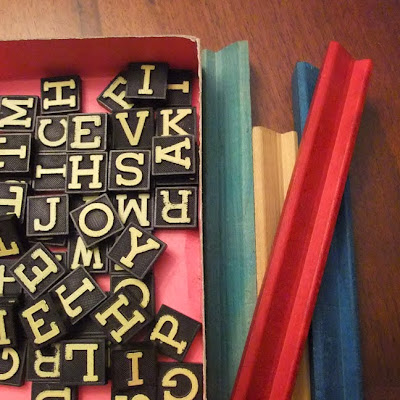 When I entered the scene of a particular yard sale a month or so ago, I almost turned around and walked right back out before doing a thorough investigation of the goods. At first glance, the sale seemed to have an abundance of overpriced Tupperware and plastic novelties. But since I had taken the time to stop the car, I figured I’d at least check out the pile of books on a back table. And that’s when I saw it. A small box shoved to the side. I gulped. Vintage scrabble?! My heart skipped a beat. There wasn’t a board, but the letters and letter racks were enough for me. With the asking price of 50 cents for the set, I realized that some people value Tupperware, while others prefer vintage letters. Absolutely nothing wrong with that.
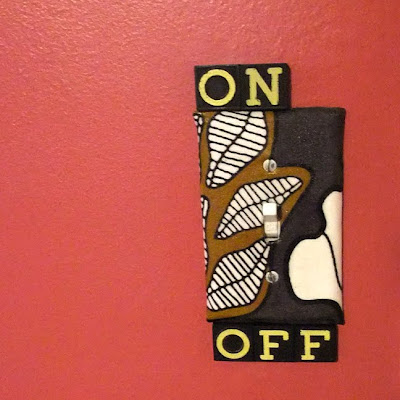
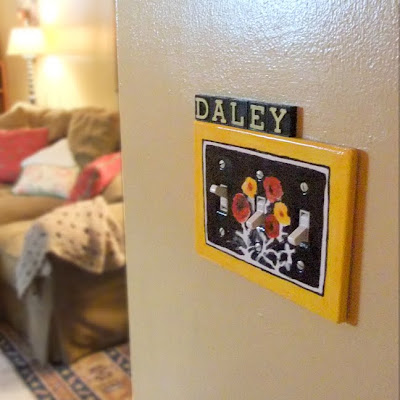 I knew those little blocky letters would be great in a mixed media piece, but I also realized they were cool enough to stand on their own. So I spelled out our name and let them rest on the light switch plate in our entryway. Hubby please stop reading…
(actually they are attached to the wall with a little dab of hot glue. Yes, I was aware that the painter of the house would not be happy with the decision to take a glue gun to the walls, but at least it’s not hay or plastic flowers, right? …anybody see those Trading Spaces episodes??!)
Hubby continue reading…
 I also came to the conclusion that my fabric covered studio switch plate could benefit from letter additions so I “attached” more tiles. I love spelling out the obvious.
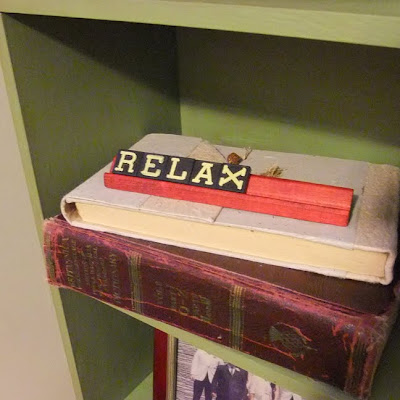 Less daring I suppose is choosing to display a word on one of those charming, old wooden racks. The X is on its side on purpose. You get it right?!
  Here’s a summer project that’s been on my list. I’ve had a quart of chalkboard paint in my studio closet for the longest time. My original intention was to add some chalkboard real estate to the basement/kids area. However, my recent read of Jen’s blog about her chalkboard paint tray transformation inspired me to do something similar, but I changed my chalk tray up with a button twist. (disclaimer: please don’t worry as the poor children weren’t left out of the quart…this tray was in addition to giving them chalk space, but that’s another post.)
 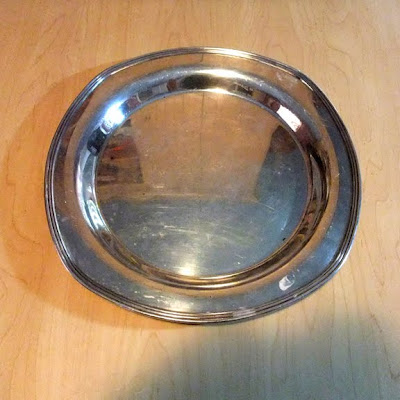 If you don’t have one of these that you’re willing to transform, don’t fret. Any respectable thrift store will have a few to chose from. I purchased my silver tray at a yard sale for 25 cents. I wanted something simple with an easily embellish-able edge.
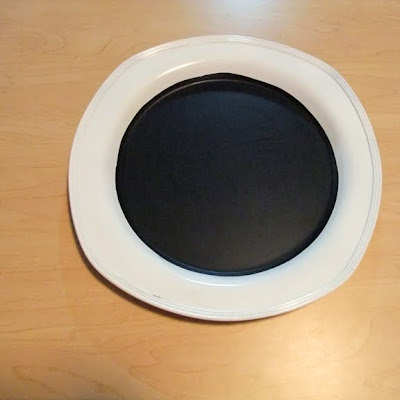 First, I primed the entire tray–front and back–with a spray primer (don’t skip this step…it makes tray painting so much easier!) Next, I used white spray paint to cover the entire front and then back of the tray. After that was dry, I applied chalkboard paint to the inside of the tray leaving the rim white. I needed two coats to get maximum coverage.
 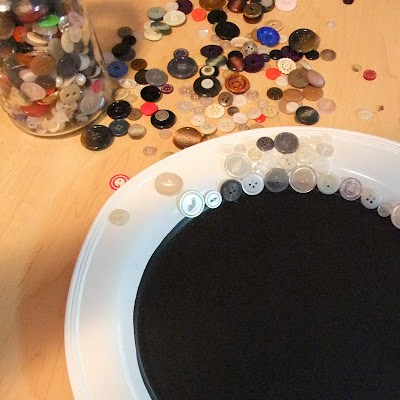 Let’s take a moment to talk about my button collection. I’ve been snatching them up for years at thrift stores and yard sales. Is it possible to have too many buttons?! I was proud of myself for actually using a small part of my button stash for this project. I tend to have some hoarding characteristics when it comes to buttons so this was good therapy.
 I’ll undoubtedly personalize the message for the various family and friends that visit and stay in our guest room over the year. We love our visitors, so I’m very excited to have this extra welcoming touch.


