
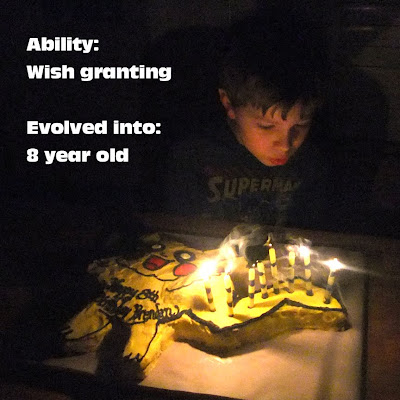
All three at the same school. It seems surreal. My youngest in kindergarten?! When did that happen? Back when they were babies, I remember staring blankly through a fog of total exhaustion hearing people say, ‘Enjoy it…they grow up so fast.’ At the time, all I wanted to know was how many more pounds/how many more weeks before this child sleeps six hours in a row?! Now look. I need a bullhorn to wake them up some most mornings. I blinked and here they are. So the start of every school year marks a bittersweet celebration. Of course you need cake and ice cream for that.

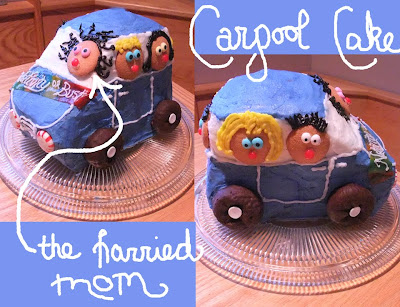
A back-to-school cake has become our tradition. This year, I decided to create a notebook cake. In the past, I’ve done a pencil, a chalkboard, a minivan carpool (super ambitious year) and an apple. There is no better way in our opinion than to rehash first days over cake and ice cream.

This notebook is spiral bound. Quickly I might add. This is one very busy notebook factory. Speaking of which, I need to get back to my homework that includes filling out a couple hundred forms that I’m pretty sure multiplied last night while we were sleeping. Here’s to another school year.
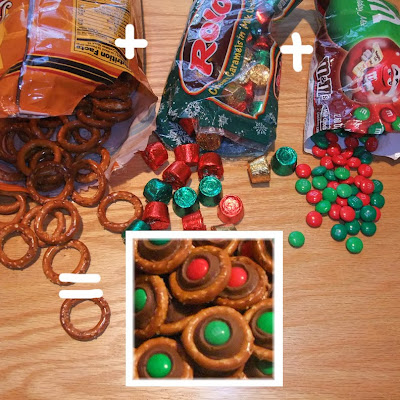 I won’t lie to you. I do make a ridiculous amount of candy this time of year, some types more involved than others. The more complicated varieties come together when the elves are at school or in bed to avoid holidaycandymakingstress, a real condition. This however, is an easy recipe for delicious candy treats that even preschool elves can make by your side. Around here we call them reindeer noses. To make your own, you’ll need:
ring-shaped pretzels (can be hard to find…Meijer’s store brand has them or just use mini pretzels)
rolo candies
m&m’s
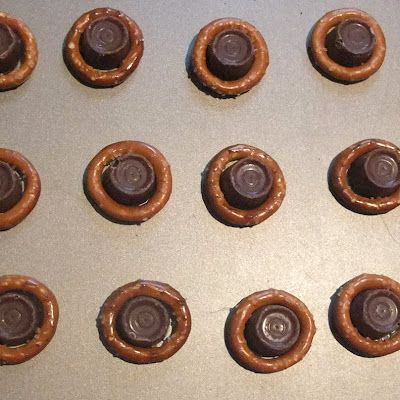 First, unwrap the rolos. Put the rolos on a baking sheet and throw them an inner tube/pretzel ringing each rolo. (If you are using a different shaped pretzel just place your rolo on top and call it a raft.) Place in a preheated 275 degrees oven for 4-5 minutes.
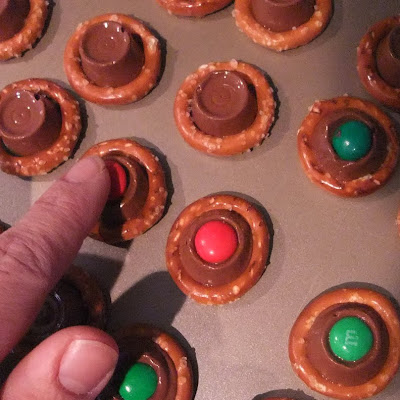 Remove from oven. Immediately press a m&m into the center of each melty rolo. Leave the candies on the baking sheet until they are cool and hardened.
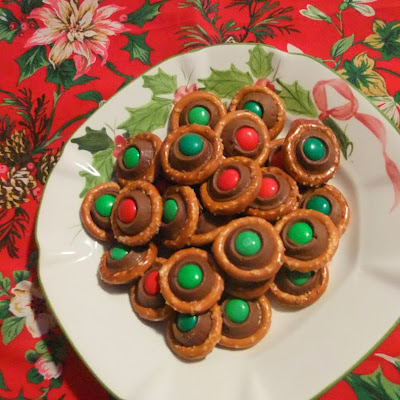 That’s it…*really.* Place on a festive dish and enjoy!
*Linking some good advice here about embracing holiday baking shortcuts (and I’m totally with Jen on the 80% off gingerbread in the attic ; )
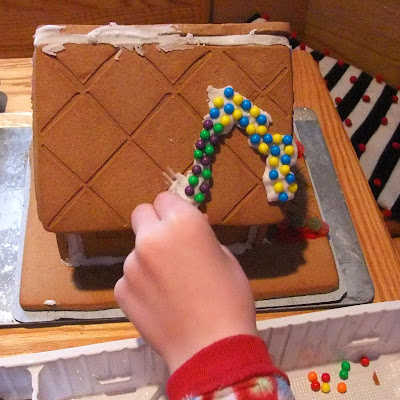
 Yesterday, with all the fixings, my three sugarplums spent the afternoon assembling and decorating the gingerbread houses left for them by St. Nick.
This has become a fun tradition that we do every year. I crank up the Christmas music and think about how (I’m sure) this will be a fond memory of their childhood.
 This house had serious structural damage/crackage from the start. Perhaps St.Nick should think twice before being tempted to buy these a year in advance (you know when gingerbread house kits are 75% off and “he” reasons that no one eats the things anyway so why not save a little cash and keep them around until next year? eh hem.)
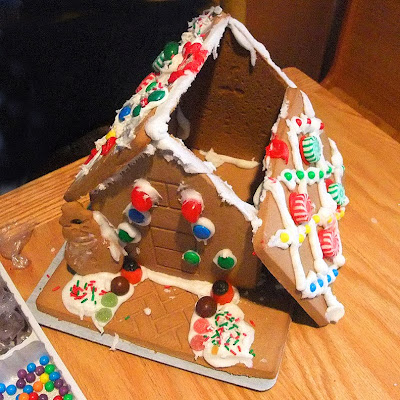 I found it quite humorous that the kits included the following note in the directions: “Do Not become DISTRESSED if your house cracks. Just repair with icing.” Same thing for roof slidage. Luckily no one became “DISTRESSED” and a very cheerful afternoon was had by all…even if this year our gingerbread village looks like it suffered some sort of unfortunate weather related event.
 Homemade apple pie is something I crave every fall…errrr actually I crave throughout the year, but even more so when the leaves are changing and the air is crisp. I’ve found the best apple pie is made with a combination of different apples for a variety of tastes in each slice. My favorite mix is Granny Smiths and Jonathans. I also prefer a crumb topping rather than a top crust. Without further chitchat, here’s my favorite recipe for a delicious apple pie.
 apple filling:6 cups thinly sliced, peeled apples1/2 cup sugar3 tbsp. all-purpose flour2 tsp. ground cinnamon1/8 tsp. salt
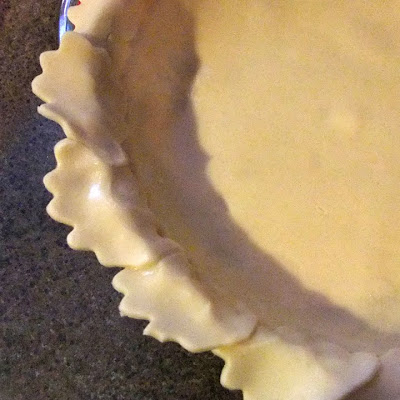 The bottom crust can be your favorite single crust pie recipe or a refrigerated Pillsbury crust…promise, I won’t tell ; ). Line the pie plate with the bottom crust and add a fancy cookie cutter edge, if you desire. Then fill with the apple mixture from above.
 To make the crumb topping, stir together:
1 cup packed brown sugar
1/2 cup all-purpose flour
1/2 cup quick-cooking rolled oats
Use a pastry blender to cut in 1/2 cup butter or margarine till the topping mixture resembles coarse crumbs.
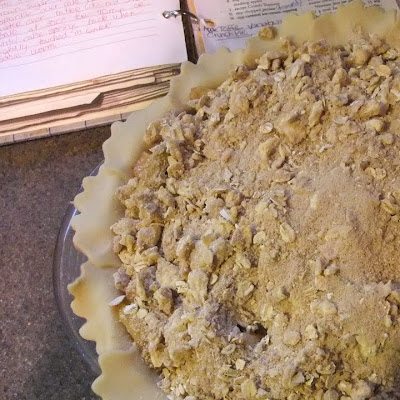 Sprinkle the crumb topping over the apple mixture. To prevent over browning, cover the edge of pie with foil. Bake in a 375 degree oven for 25 minutes. Remove foil and bake for 25-30 minutes more until the pie top is golden.
  Remove from oven and cool. Send hubby to store for forgotten vanilla ice cream and enjoy.
I’ll be back soon. Many projects were wrapped up last week so now I’m enjoying time for things like pie, crafts and our nearly complete renovated bathroom! Hurray for Fall!
Also perfect for the season…a recipe for Gratitude rolls over here.


